
Basic Cross Fit Techniques for Beginners: Start Strong with Safe Workouts
Getting started with functional fitness can feel overwhelming — the equipment, the buzzwords, the fast-paced classes. This short guide breaks down Basic Cross Fit Techniques for Beginners into clear, doable steps so you build strength, avoid injury, and keep showing up. (Keyword used once.)
No fancy gym membership or advanced programming needed — just consistent practice of the fundamentals. This article gives a simple warm-up, the core movements to learn, a sample beginner workout, common mistakes to avoid, and an FAQ to answer quick questions about form and progress. (Keyword used once.)
If you focus on technique over ego you’ll progress faster and stay healthier. Read the next sections, practice slowly, and use this as your checklist for every session. These Basic Cross Fit Techniques for Beginners will set the foundation for every WOD or strength session you do next. (Keyword used once.)
Why technique matters
Before chasing PRs or fast times, technique protects your joints and maximizes gains. Proper form helps translate effort into usable strength and stamina, rather than wear and tear. Building a movement habit now saves months of lost training later.
Warm-up and mobility (10 minutes)
A fast, focused warm-up prepares your nervous system and lubricates joints.
-
3–5 minutes light cardio (row, bike, jump rope)
-
Dynamic mobility: leg swings, hip circles, shoulder pass-throughs
-
Movement prep: 2 rounds — 8 air squats, 6 lunges (each leg), 10 PVC pass-throughs (or banded), 5 scapular pull-ups
Finish the warm-up with lighter practice of the movement you’ll train that day.
Foundational movements to learn (priority order)
When learning Basic Cross Fit Techniques for Beginners, prioritize quality over load. Focus on these patterns — they appear in nearly every CrossFit workout:
-
Air squat — hips back, chest up, knees tracking over toes. Depth is below parallel when mobility allows.
-
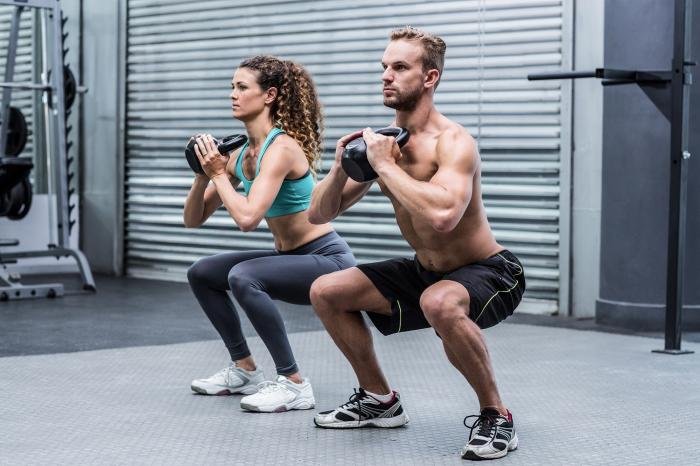
Hinge (deadlift pattern / kettlebell swing) — hip hinge, neutral spine, drive hips back and then forward.
-
Pressing (push press & strict press) — stable ribcage, engaged lats, bar path close to face.
-
Pulling (ring rows, pull-ups) — retract shoulder blades first; use bands to scale.
-
Lunge/step — balance and control through the front knee.
-
Bracing & breathing — learn diaphragmatic breathing: brace your core before each rep.
Practice each movement with bodyweight or a light implement until form feels repeatable.
Movement cues and micro-tips
-
Squat: sit between your heels, keep knees out, chest tall. Cue: “pack the hip crease.”
-
Hinge: push hips back, soft knees, feel tension in hamstrings. Cue: “close the car door with your butt.”
-
Deadlift: chest up, bar close to shins, squeeze glutes at lockout.
-
Press: tuck ribs slightly, squeeze glutes, press the bar up and slightly back.
-
Pull-up progression: start with ring rows → banded pull-ups → slow negatives → full pull-ups.
Record 1–2 sets on your phone periodically to review form — visual feedback speeds improvement.
Sample beginner workout (20–25 minutes)
Scaled for someone new; maintain technique, not speed.
Warm-up (as above)
Strength/Skill: 3 sets — 8 kettlebell deadlifts (light), 6 ring rows
WOD (AMRAP 12):
-
10 air squats
-
8 kettlebell swings (light)
-
6 alternating lunges (total)
Cool down: gentle stretching and foam rolling
Scale options: reduce reps, lower kettlebell weight, replace swings with deadlifts until hip hinge is smooth.
Common mistakes and how to fix them
-
Rushing into heavy loads: if you can’t do 5 flawless reps with perfect form, the weight is too heavy. Slow down.
-
Holding breath incorrectly: exhale on exertion, inhale during lowering phases; brace before each rep.
-
Sagging lower back on hinge: reduce load, practice hip hinge drill (stick behind glutes).
-
Knees caving on squat: cue “knees out,” strengthen glute med with banded walks.
Small technique drills done consistently (5–10 minutes, 2–3x/week) beat random heavy sessions.
How to progress safely
-
Practice movement pattern 2–3x/week.
-
Add load only when you can perform target reps with good form for 2 consecutive sessions.
-
Track progress (weights, reps, feel).
-
Rest adequately — recovery is where strength grows.
Listen to pain vs. normal soreness. Sharp joint pain is a red flag — stop and reassess.
FAQs
Q: How often should a beginner do CrossFit workouts?
A: Start with 2–3 sessions per week focusing on skill and conditioning. Add a day once you recover well and technique is consistent.
Q: Do I need a coach?
A: A coach or experienced friend is extremely helpful early on to correct form and give programming feedback, but many people begin with guided videos and slow practice.
Q: What equipment is essential?
A: Basic kit: a kettlebell or dumbbell, a barbell (optional), pull-up rig or bands, and space to move. Many foundational skills can be trained with just bodyweight and one kettlebell.
Quick checklist before every session
-
Warmed up 8–10 minutes
-
Mobility for the day’s focus (hips/shoulders)
-
2 light practice sets of the skill movement
-
Clear rep/weight goal for the session
-
Phone or partner to record/check form
Conclusion
Start simply and prioritize consistency: Basic Cross Fit Techniques for Beginners should feel deliberate, not rushed. Practice the core patterns, warm up properly, and progress only when form is solid. Remember that Basic Cross Fit Techniques for Beginners are mastered through repetition and mindful coaching — not by lifting the heaviest weight on day one. Over time, safe practice of these Basic Cross Fit Techniques for Beginners builds strength, confidence, and enjoyment in your training.